One of the first birthday cakes that I remember receiving as a child was a Snow White barbie doll cake. It was positively magical- I’m not sure what makes a plastic figurine surrounded by a bell-shaped gown made of pastry and frosting so irresistible, but 3-year-old Heather was completely smitten. This was the pre-fondant era of cake decorating, so it was still a terrific novelty to make a cake that didn’t necessarily look like a cake (umm, am I making myself sound really old now…?)
And yet, even with the homebaker’s access to more novelty cake methods than can practically be imagined, little girls still can’t resist the allure of the doll cake. Along with the fact that if you have a daughter under the age of 11, it is quite likely you have been asked to throw a Frozen-themed birthday party. So even though I haven’t posted very many tutorials on my blog, I think this one might be pretty timely.
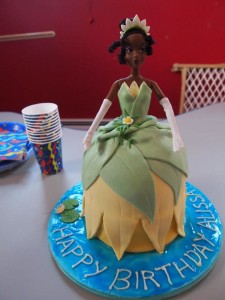
Elsa is my second doll cake- I did this Princess Tiana cake a few years ago. The layers on Tiana’s dress had caused me a bit of a headache, so I was hopeful that Elsa’s gown would be a bit simpler.
The first step is to layer and stack your cakes. I had used four 6-inch cakes for the Tiana cake, which caused her dress to be very symmetrical and bell shaped. This wasn’t necessarily a bad thing for Tiana, but Elsa’s dress and cape are more flowing, so I used two 8-inch cakes and two 6-inch cakes to create this effect. If I made this again, I would actually use four 8-inch cakes instead, because the different sizes made a stair-step effect in the back which I had to remedy with lots of cake bits and frosting to fill it in.
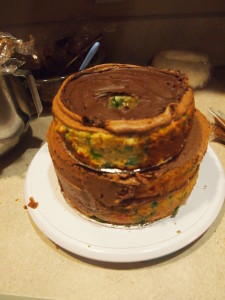
First, I filled my 8-inch vanilla cakes with chocolate ganache (see recipes below) and measured and cut three supports. These are plastic, but I usually use wooden dowels or straws. It’s possible that this step may be unnecessary, but I feared four layers of cake left to their own devices might slump and crumble without support.
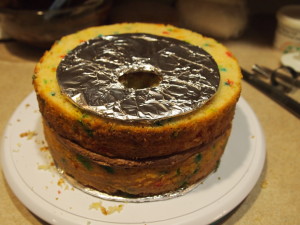
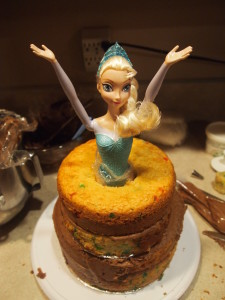
I then covered a cardboard cake circle with foil and cut a hole large enough to fit Elsa’s thighs through. I also carved out a small hole in the cake layers. Her toes are pointy and thin so you don’t have to make a huge hole, especially in the bottom layers.
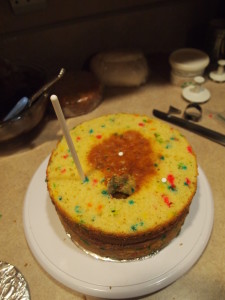
Then I filled and stacked the 6-inch cakes on top- this picture shows the ganache filling between my 6-inch cakes. I used a medium circle cookie cutter for the hole, lining it up with the hole in the cake board. I did not center the smaller layers because I wanted the back to have more volume than the front. Admittedly, it’s not looking very pretty at this point. This is the part when you might start thinking, “what the heck have I gotten myself into?” Hang in there tiger, it’s going to get better.
I undressed Elsa from her real clothes and wrapped her lower half in plastic wrap, to avoid having to scrape buttercream out of her joints later on. If the cake doesn’t quite come up to the appropriate height, never fear- frosting will cover a multitude of sins…and cake errors.
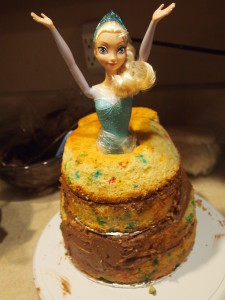
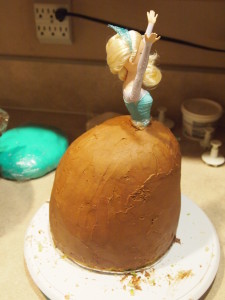
I would suggest using a sturdier cake recipe or working with frozen cakes anytime your are carving a shape. At this point in the process, I started getting a wee bit frustrated because her gown was not the shape I had envisioned it to be- it’s much better to have more cake than you need and throw away lots of scraps than not have enough to work with. You can see in the back how I had to fill in with a cake scrap. My perfectionist side was starting to get the better of me, but Elsa seemed to be just encouraging me to let it go, so I did. *collective groan*
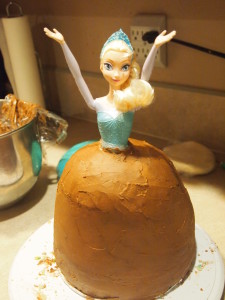
Once you are happy with your shape, go ahead and slather on that wonderful buttercream and take a long sigh of relief. It’s finally starting to look like a dress and not a hot mess!
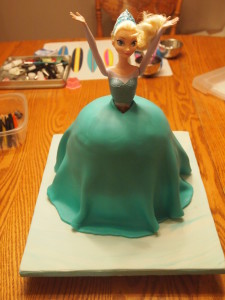
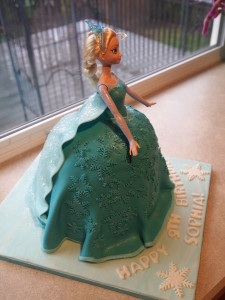
Next, I transferred Elsa over to the cake board I had made out of foam board and marbled fondant. I rolled out my teal fondant into a circle, cut a slit to the center of the circle and then wrapped the fondant around her waist, with the seam meeting in the back. I wish I had more pictures to show you, but my fingers were sticky and once you start the process with fondant, you have to work fast so it won’t dry out on you.
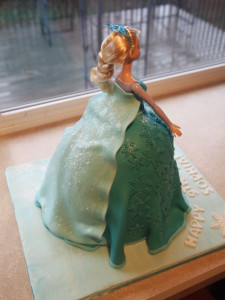
The key to creating the folds is to have a very wide circle so you have enough fondant to work with to make it look like her dress is rippling. Some princess dresses look great without any ruffles, so you could make it smooth, but I felt like Elsa’s dress needed some movement to it. I used a small knife to cut off the excess at the hem of her dress. It’s tricky to work with chocolate buttercream because it always seems to sneak it’s way out of under the fondant. Try working with vanilla if you are a beginner- it’s much more forgiving if you make any mistakes.
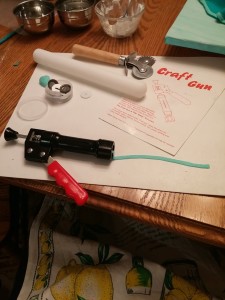
The hem of the dress was looking a little raw, so then I busted out my new Christmas present: a craft (or sugar) gun. I’ve seen these being used in lots of video tutorials, and I was thrilled when mine worked like a dream to create a long flat ribbon to finish off the bottom of the skirt. If you are a cake geek, I definitely recommend getting your paws on a sugar gun- you can use it to make hair, vines, ropes, etc. Then you can also pretend you are a vigilante against those who don’t eat dessert and use the gun to force them into sugary submission. But I digress…
If you don’t have access to this nifty gadget, you can clean up the bottom of her skirt by either piping it with frosting or hand-rolling a rope of fondant and attaching it with a little water and a paint brush.
For her bodice, I simply cut a piece of fondant that was roughly the size/shape of her torso, dabbed her body with wet paintbrush and wrapped it around her with the seam in the back. Then I used a thin cutting tool (you could use a small knife) to shape it around her bust. I cleaned up her waistline with a rope of fondant with the help of my sugar gun.
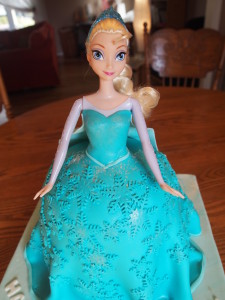
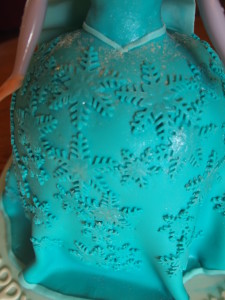
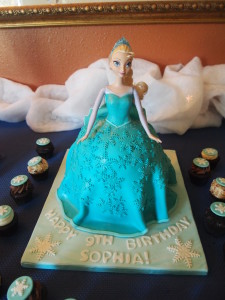
Elsa’s dress in the movie is very shimmery, but doesn’t have very many details. Once I was happy with the basic dress, I took some artistic license in order to make it more visually interesting. I have these wonderful snowflake plungers and they worked nicely to give the dress texture and detail. If you are going to do Elsa, don’t even think about skimping on the luster dust- she absolutely needs the shimmer.
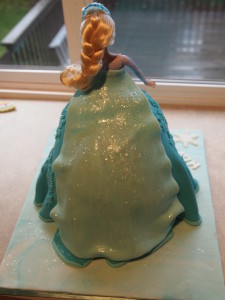
And finally, there’s her cape. First, I cut a tapered piece of lighter teal gumpaste/fondant blend and attached it under her arms and along the back of her bodice with a little water. I used the blend (which is about 50/50) because it is easier to roll out very thin and dries more quickly. Fortunately, her cape will also cover up the seams on the bodice and on the skirt if this was looking messy at all. I wanted the cape to flow behind her, so I tucked a little crumpled paper towel between her bodice and the back of her dress and let the fondant blend dry for a few hours before removing it.
Elsa’s cape is translucent in the movie and literally looks like ice, which is nearly impossible to recreate with fondant. However, cake sparkles did the trick, especially when used generously- just moisten the cake a bit with water, and the sparkles will stick nicely.
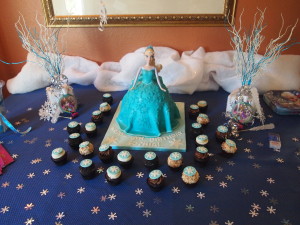
And there you have it: Elsa in all her icy and misunderstood glory. Maria, an old friend from high school, ordered this from me and had created the most adorable tablescape- it was a little girl’s dream Frozen party. She also ordered a few dozen mini cupcakes from Bella Cupcake (the bakery I work at occasionally) and I made some sweet little snowflake toppers to finish off the whole scene.
One thing to note: doll cakes can be an awful mess to cut, especially if you have put in the extra supports and cardboard between the layers. But most people don’t mind, as long as it gets in their mouths! 🙂
Some helpful links:
Want to know how to make a cake board? Check out this post!
Want to know how to make your own marshmallow fondant? Check out this post!
And now for some recipe sharing!
Vanilla Cake
This cake is nice and moist and has a medium crumb- great for cakes that need a little structure to them. It makes wonderful cupcakes as well! If you are high elevation, I can also share my adjustments for your baking success- just comment below!
2 1/2 cups all-purpose flour
1 tsp Baking powder
1/2 tsp Baking soda
1/2 tsp salt
3 eggs
2 cups granulated sugar
1 cup canola oil
2 tsp pure vanilla extract
1 cup sour cream
Optional: 2 TB sprinkles for funfetti style
1.) Preheat oven to 350 degrees F. Butter and flour two 8-inch cake pans and line with parchment. (Or line cupcake pans with paper liners)
2.) Sift flour, baking powder, soda and salt into a medium bowl.
3.) In a separate mixing bowl on low speed, beat the eggs and sugar until thick; scrape the sides and bottom of the bowl when done. Add in oil and vanilla until well blended. Mix in sour cream. Add dry ingredient mixture and blend until smooth. Fold in sprinkles (if using).
4.) Divide batter evenly between pans and bake for 30-35 minutes for cakes or 15 minutes for cupcakes.
-Adapted from Heather Saffer
Dark Chocolate Ganache
8 oz bittersweet or dark chocolate, finely chopped (I usually use Trader Joe’s Dark Chocolate Pound Plus Bar)
1 cup plus 2 TBs heavy cream
½ stick (4 TB) unsalted butter, cut into pieces, at room temp (really make sure it’s unsalted- salted butter makes this taste really salty)
1.) Put the chopped chocolate in a heatproof bowl.
2.) Bring the cream to a boil, then pour half of the cream over the chocolate and let it sit for 30 seconds. Working with a whisk or rubber spatula, gently stir the chocolate and cream together in small circles, starting at the center of the bowl and working your way out in increasingly larger concentric circles. Pour in the remainder of the cream and blend it into the chocolate, using the same circular motions. When the ganache is smooth and shiny, stir in the butter piece by piece. Don’t stir the ganache any more than you must to blend the ingredients—the less you work it , the darker, smoother and shinier it will be.
3.) If you are using the ganache as a glaze or as a filling for a pie or tart, us it immediately. If you are using it a as filling or a frosting for a cake, let it sit on the counter until it thickens to the desired consistency you want, but in that case, keep checking on it—refrigerate it for too long, and it will thicken enough to be rolled into truffles.
-Adapted from Dori Greenspan
